
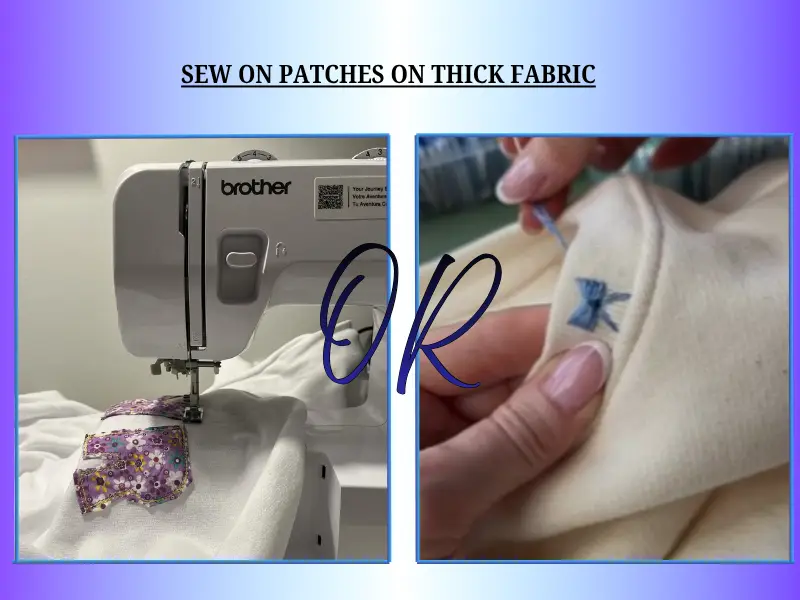
How to Sew on a Patch to Thick Fabric: Step-by-Step Guide
Thick fabric changes the rules. A patch that sits flat and stitches easily on a cotton tee can bunch, shift, or refuse to hold once you move to denim, canvas, or leather. The needle drags, the thread strains, and a stitch that looked fine halfway through can pucker the fabric by the time you finish.
None of that means the job is harder, just different. Once you match the needle, thread, and stitch to the fabric you’re working with, sewing a patch onto something heavy-duty holds up just as well as anything store-bought.
Why Thick Fabric Needs a Different Approach
On thin fabric, technique does most of the work. On denim, canvas, or leather, the tools matter just as much.
A standard needle bends or snaps trying to push through multiple layers of stiff material. Regular thread doesn’t fare much better. It’s built for lighter stress and tends to snap once the fabric fights back. That’s why the approach ahead relies on heavier gear from the start:
- A stronger needle (leather or heavy-duty, not a basic sewing needle)
- Thread rated for tension, not everyday cotton
- Stitches sized for grip, not just appearance
Get these three right, and the rest of the process, hand or machine, becomes far more forgiving.
Secure the Patch Before You Sew
A patch that shifts even slightly while you’re stitching throws off the whole line. Before the needle comes out, get it locked in place.
Pins or Clips
Pins work fine on denim and canvas. On leather, skip them. Pins leave permanent holes, so binder clips or a few pieces of masking tape hold just as well without marking the material.
Glue or Basting Spray
For curved or slippery spots where pins won’t sit right, a couple of dots of fabric glue or a light coat of basting spray keeps the patch flat while you sew. It’s temporary, just enough to stop movement.
Snap a Photo
Before anything gets pinned down, take a quick photo of the placement. If a pin shifts the patch even a little, you’ll know exactly where it’s supposed to go. Once the patch is secured, this is also the stage where a lot of people decide to create your own embroidered patches instead of buying pre-made ones, since custom shapes hold placement more evenly.
Sewing a Patch by Hand
Hand sewing gives you the most control, especially on thick or curved material where a machine can slip.
Needle Choice
Skip the standard sewing needle. A heavy-duty or leather needle pushes through denim and leather without bending halfway through.
Thread Type
Regular cotton thread snaps under the strain of thick fabric. Waxed thread or heavy polyester holds up far better and won’t fray as you pull it through.
Stitch and Spacing
A whip stitch or backstitch works best. Keep stitches close, about 2 to 3mm apart, so the patch doesn’t gap or pull loose at the edges.
Use a Thimble
Pushing a needle through denim or leather by hand takes real force. A thimble protects your fingers and makes the whole process faster.
To stitch a patch by hand:
- Knot the thread and start from the inside of the fabric
- Bring the needle up through the edge of the patch
- Work around the patch in small, even stitches
- Knot twice on the inside once you’re done
- Trim the excess thread close to the knot
If hand-stitching every patch sounds like too much for a big batch, a sew on patches maker can prep pre-finished edges that are easier to hand-sew through.
How to Sew a Patch by Machine
A machine is faster than hand sewing and holds up well on thick fabric, as long as the setup matches the material.
Needle Size
Use a denim or leather needle, size 90/14 or 100/16. Anything smaller struggles to get through multiple layers and can bend or snap mid-stitch.
Stitch Setting
Set the machine to a zigzag stitch with a medium-long length, around 3.0. This gives the thread enough give to handle the thickness without breaking.
Sew Slowly
Thick fabric doesn’t move under the needle the way thin fabric does. Slow the machine down so each stitch lands where it should instead of skipping or bunching.
Pivot at Corners
When you reach a corner or curve, stop with the needle down, lift the presser foot, turn the fabric, and then continue. This keeps the stitch line even instead of pulling at the edge.
Manage Bulk
If the fabric is bunching up around the presser foot, roll or fold the excess out of the way so it doesn’t drag or catch as you sew.
Steps to follow:
- Pin or clip the patch in place
- Load the needle and set the zigzag stitch
- Sew slowly around the edge, pivoting at corners
- Backstitch at the end to lock the thread
For anyone who’d rather skip the machine setup entirely, embroidered patches Vancouver shops often handle both the patch-making and the stitching in one order.
Sewing Curved Edges on Thick Fabric
Corners and curves are where most patches start to look uneven, even after solid stitching everywhere else.
On a Machine
Stop with the needle down before turning. Lifting the foot without dropping the needle first lets the fabric shift, and the stitch line drifts off the patch edge.
By Hand
Shorten your stitches as you move around a curve. Longer stitches pull the fabric tight on one side, which drags the edge out of shape.
Why It Matters
A patch can hold perfectly along the straight sides and still lift at a corner if the stitching wasn’t adjusted there. Slowing down through these spots is worth the extra minute.
Mistakes That Ruin Patches on Thick Fabric
Even with the right tools, a few small habits can undo the work. Here’s what usually goes wrong and how to fix it.
| Mistake | Why It Happens | Fix |
| Puckered fabric | Thread pulled too tight | Keep tension even, don’t overtighten |
| Patch lifts at corners | Single stitch line, no reinforcement | Double-stitch high-stress spots |
| Thread keeps snapping | Regular thread on thick material | Switch to heavy-duty or waxed thread |
| Needle bends or skips | Needle too thin for the fabric | Use a 90/14 or higher, or a leather needle |
Most of these come down to one of two things: the wrong thread or needle for the material, or stitching too fast through spots that need a slower hand. Catching either early saves you from redoing the whole patch.
Simple Care for Long-Lasting Patches
Good stitching still needs a little upkeep, especially on pieces that get worn or used often.
Wash Care
Turn the garment inside out before washing. Use cold water and skip the dryer where possible, since heat and tumbling put the most strain on stitches.
Regular Checks
Look over the stitching every so often, especially on jackets, bags, or anything handled daily. Catching a loose thread early is far easier than fixing a patch that’s already half off.
Reinforce Early
If a thread starts to loosen, re-knot or add a few extra stitches right away instead of waiting for it to fully come undone.
Quick checklist:
- Wash inside out, cold water only
- Air dry instead of using the dryer
- Check stitches every few washes
- Fix loose threads as soon as you spot them
Once hand-sewing feels comfortable, it’s an easy skill to carry into other small projects, like when you want to make attractive beaded keychains easily using the same basic stitches.
Questions People Usually Ask
Is it better to glue or sew a patch on thick fabric?
Sewing holds up better long-term, especially on denim and canvas that go through regular washing. Glue works as a temporary fix or for materials like leather where stitching is trickier, but it tends to loosen faster with wear.
Can I iron on a patch instead of sewing it onto thick fabric?
Iron-on works on cotton, denim, and canvas if the patch has heat-activated backing, but it’s not reliable on leather or synthetic material since high heat can melt or damage the fabric. Stitching over an iron-on patch adds extra hold either way.
What thread holds up best on thick fabric?
Upholstery thread, heavy-duty polyester, or doubled all-purpose thread all work well. Regular cotton thread is too thin for denim, canvas, or leather and tends to snap under the extra tension thick material puts on it.
Why do iron-on patches fall off thick fabric?
Usually it comes down to not enough heat, movement before the glue fully cools, or trying to iron onto a fabric that can’t handle direct heat, like leather or coated canvas. Adding stitches around the edge fixes most of this.
Can I use fabric glue instead of sewing on thick fabric?
Glue can work for a quick or temporary hold, but it isn’t as durable as stitching once the fabric is put through regular wear or washing. For anything meant to last, sewing is still the more reliable option.
Wrapping Up
Sewing a patch onto thick fabric comes down to matching the right tools to the material. A stronger needle, heavier thread, and slower stitching handle denim, canvas, and leather far better than the basic approach used on lighter fabric.
Whether you’re working by hand or by machine, the same basics apply: secure the patch first, keep tension even, and take extra care around corners. Get those right, and the patch stays put through regular wear and washing, not just the first few weeks. With the right setup, sewing on thick fabric isn’t harder, just a slightly different process.

I’m the creative voice behind the blog at Embroidered Patches Canada, where I turn custom patch design into clear, practical insights for brands, teams, and creators. I provide tips on how to design embroidered patches that not only look spectacular but also have a lasting impact, covering everything from materials and stitch styles to advertising strategies and patch trends. I help companies, organisations, and individuals transform their ideas into elite custom patches that tell a story by providing in-depth instructions, trend updates, and professional advice.