
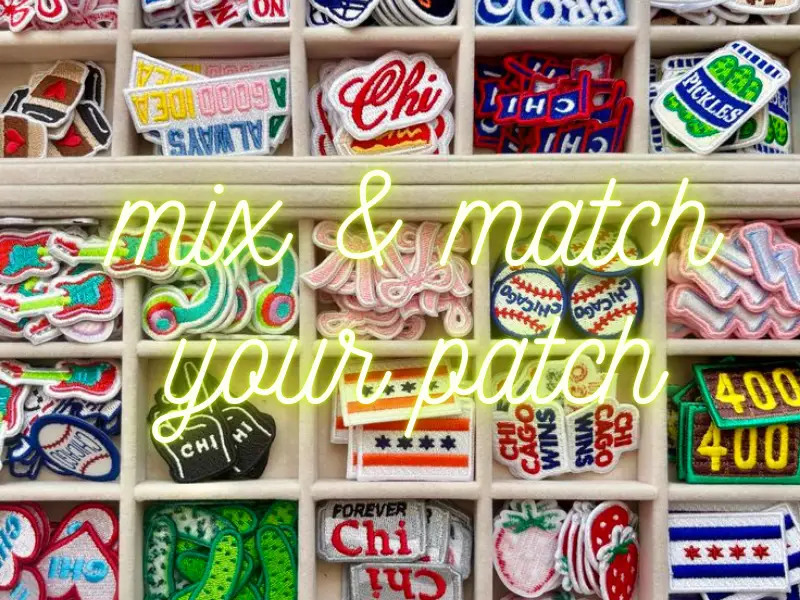
How to Mix and Match Patches Without Overdoing Your Look
Patches are one of the easiest ways to add personality to a jacket, bag, or cap. One good patch on a plain surface instantly changes how the whole piece looks. The problem starts when that one patch turns into five or six, added without much thought about spacing or placement. What began as a styling choice quickly turns into visual clutter, and the garment ends up looking busy instead of intentional.
This guide is about learning how to mix and match patches without hitting that tipping point. It’s not about rules that limit your creativity, but about spacing, placement, and balance that make every patch actually stand out instead of competing with the ones next to it.
How Many Patches Should You Wear at Once?
There’s no fixed number that works for every jacket or bag. What actually matters is how the patches sit together, not how many you’ve added. Two large patches can look busier than five small ones if they’re placed without any breathing room between them.
Think in Terms of Visual Weight, Not Count
A patch’s size, color, and detail level all add to how much attention it pulls. A bold, colorful patch next to another bold patch creates competition, even if there are only two of them. Smaller, simpler patches can sit closer together without overwhelming the piece.
The Tipping Point Is Easy to Spot
You’ll know you’ve crossed it when the eye doesn’t know where to land first. That’s usually the real sign to stop adding and start editing. Learning to mix and match patches well is less about counting and more about reading the balance as you go.
Where Should Your First Patch Go?
Before you start layering patches, pick one spot to anchor the whole look. This is the patch people notice first, so it sets the tone for everything you add later.
Chest, Sleeve, or Back?
Each spot works differently:
Chest:
It is best for a single statement patch, subtle and personal
Sleeve:
Good for smaller patches that don’t compete with the main design
Back panel:
It works when you want one large patch to be the clear focal point
A lot of people start this process with a simple search, like embroidered name patches near me, since a name or initials patch gives an easy, low-risk anchor point before adding anything bolder.
Build Around One Anchor
Once that first patch is placed, everything else should support it, not pull attention away from it. This is really the first real step in learning how to mix and match patches without it turning into a cluttered mess later on.
Should Your Patches Match or Contrast?
This is where most people get stuck. The easiest way to answer it: patches don’t need to match in color, but they should share some kind of story. That’s what makes a collection look put together instead of random.
Group by Theme, Not Just Looks
Travel patches next to travel patches. Band patches next to band patches. Even a mix of hobby-related patches works well if there’s a common thread tying them together. The moment you throw in something unrelated, like a cartoon patch next to a military-style one, the whole look loses its direction.
A Simple Before-and-After
Picture a denim jacket with five random patches from five different worlds. It looks cluttered, and none of them really stand out. Now picture the same jacket with patches that all lean into a travel theme, different cities, maps, and plane icons. Suddenly, it reads as a collection, not clutter.
That’s really the core of learning to mix and match patches well: a little bit of theme goes a long way.
Why Does Empty Space Matter With Patches?
Empty space isn’t wasted space. It’s what lets the patches you already have actually stand out. Without it, even a handful of great patches start blending into one loud, busy mess.
Give Every Patch Room to Breathe
Think of plain fabric as the pause between sentences. A jacket or bag needs a few of those pauses, spots where the eye can rest before landing on the next patch. Without them, nothing gets a chance to feel special on its own.
A Simple Rule of Thumb
A good target is to leave about 30 to 40 percent of a panel free of patches. That’s usually enough space to keep the collection looking curated instead of packed. This is a big part of how to mix and match patches in a way that still feels clean and easy to look at.
Does Fabric Type Change Patches?
Yes, and this is something a lot of people overlook. Sturdier fabrics can carry more patches without looking overloaded, while lighter materials need a much lighter hand.
What Different Fabrics Can Handle A Patch
Denim and canvas:
thick and durable, so they support more patches and heavier stitching without sagging or puckering
Cotton and lighter blends:
need fewer, smaller patches so the fabric doesn’t pull or wrinkle around the stitching
Uniform shirts:
usually call for one or two clean, well-placed patches rather than a full collection
Getting the Embroidery Right for the Fabric
The fabric also decides what kind of stitching will actually hold up. This is where you should look for custom patches embroidery near me. Working with experts makes a real difference, since a good embroiderer will adjust thread density and backing based on what the material can handle. Getting this step right is a quiet but important part of learning how to mix and match patches so they hold their shape over time, not just look good on day one.
Patches on Work Uniforms
Patches aren’t just a personal style choice. On work uniforms, they serve a real purpose: making a team look like a team.
Consistency Creates Recognition
When every team member’s uniform has patches placed the same way, name, logo, or department badge in the same spot, it becomes easy to identify who’s who at a glance. This kind of consistency is exactly how you boost team identity with custom uniforms, since repetition across a group builds recognition faster than any single patch could on its own.
Less Is More in a Work Setting
Unlike personal jackets, uniforms don’t benefit from a full patch collection. One or two clean, well-placed patches say more than a crowded shirt ever could. The goal here isn’t self-expression the way it is on a jacket or bag, it’s clarity. And that’s really the same principle behind learning how to mix and match patches anywhere: fewer, well-placed patches almost always read better than too many at once.
What Are the Rules for Mixing Patches Without Overdoing It?
There’s no strict formula, but a few simple habits keep things looking intentional instead of accidental.
Keep a Max Per Area
Stick to two or three patches per zone, chest, sleeve, or back panel, rather than spreading small ones everywhere. This keeps each area easy to read at a glance.
Space Them With Purpose
Leave clear gaps between patches instead of placing them edge to edge. Even a small gap makes the difference between a curated look and a cluttered one.
Mix Sizes, Not Just Themes
Pairing one larger patch with a couple of smaller ones creates a natural hierarchy. All-same-size patches tend to compete for attention instead of complementing each other.
Skip Perfect Symmetry
Patches placed in a mirrored, exact pattern often look stiff. A slightly off-center, natural arrangement usually looks more genuine.
These same habits apply beyond personal style, too. Even in workwear, where uniforms improve employee professionalism, it’s the clean, well-spaced placement that makes the difference, not the number of patches. That’s really the whole idea behind learning how to mix and match patches well.
How to Fix a Jacket That Already Has Too Many Patches
If your jacket already feels overloaded, you don’t need to start over. You just need to edit it the way you’d edit a cluttered room, take a few things out, not add more. Start by removing the patches that feel repetitive or don’t add anything new to the story. If you have three patches doing the same job, keep the best one and set the rest aside. Sometimes the patch count is fine, but everything is placed too close together, so relocating just one or two patches to a different panel or sleeve can instantly open things up.
Try Resizing Before You Give Up
If removing isn’t an option, resizing can help too. Swapping a bulky patch for a smaller version of the same design keeps the meaning without adding to the clutter. This is really the fastest way to fix a jacket that’s gone from styled to overdone, and it’s a good reminder of why learning to mix and match patches early on saves you this cleanup later.
Still Have Questions? Here’s What People Usually Ask
Is there a limit to how many patches you can put on a jacket?
There’s no official cap. Some fit a dozen, others fit over a hundred. Spacing and layout matter more than the actual number, since a crowded 15 can look worse than a spaced-out 40.
What’s the best fabric for patches to stay put?
Denim and canvas hold stitching well without sagging or tearing over time. Lighter fabrics can work too, but they need smaller, lighter patches so the seams don’t pull or wrinkle.
Should patches be sewn on or ironed on?
Sewing holds up better through regular wear and repeated washing, making it the more reliable long-term choice. Iron-on works fine for occasional use, but it tends to loosen faster with time.
Where should you place your first patch on a jacket?
Most people start with the chest or back panel since it gives a clear anchor point. From there, sleeves and smaller areas are easier to fill in without the layout feeling random.
The Bottom Line on Mixing Patches
Great patchwork isn’t about how many you own. It’s about how well they’re placed. A couple of well-chosen patches, spaced with intention, will always outshine a jacket crammed with too many at once. Once you get the hang of it, learning to mix and match patches becomes less about rules and more about instinct, and every piece you wear starts to feel a little more like yours.

I’m the creative voice behind the blog at Embroidered Patches Canada, where I turn custom patch design into clear, practical insights for brands, teams, and creators. I provide tips on how to design embroidered patches that not only look spectacular but also have a lasting impact, covering everything from materials and stitch styles to advertising strategies and patch trends. I help companies, organisations, and individuals transform their ideas into elite custom patches that tell a story by providing in-depth instructions, trend updates, and professional advice.