
How to Choose, Apply & Order Custom Patches in Canada
You got the uniforms. Everything arrived on time, the sizing is right, but something feels off. They look like every other team’s kit. Every other company’s workwear. Nothing on them says this is us.
That’s usually the moment people start looking into custom patches.
And once you do, you realize there’s more to it than picking a design and placing an order. The type of patch matters. Where you put it matters. How it’s made determines whether it survives one wash or fifty.
This guide walks you through all of it, from choosing the right patch for your garment to finding a reliable supplier in Canada. No overwhelming options. Just what you actually need to know.
What Custom Patches Actually Do For an Outfit
A patch does more than fill empty space on a sleeve or chest pocket. It tells people something about who you are, what team you’re on, and what your business stands for. That identity piece matters more than most people think when they’re placing a first order.
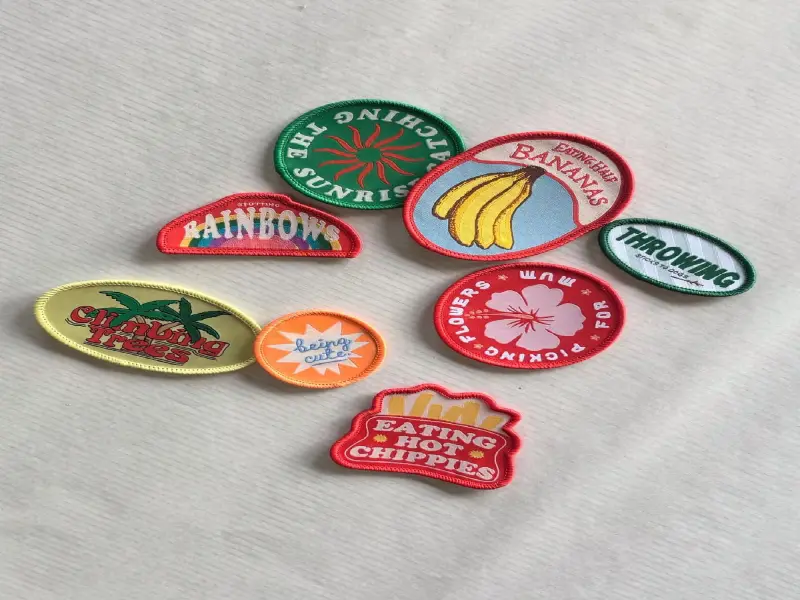
Embroidery patches custom that are made for your brand or team carry a different weight than a printed logo. Literally, the thread sits raised off the fabric. The edges are clean. It doesn’t crack after a few washes or fade under a season of wear. A printed alternative might look fine on day one, but embroidery holds up the way a well-made garment should.
That durability is why most uniform programs, workwear brands, and team kits default to embroidery. Once you’ve seen the difference in person, it’s hard to go back.
The Main Types of Custom Patches (And What Each One Is Good For)
Not all patches are built the same. The type you choose depends on your fabric, your design, and how much wear it needs to handle.
Embroidered:
The most common choice for uniforms and team kits. Thick thread, clean edges, holds up through regular washing. Works on almost anything.
Woven:
Same idea as embroidered, but finer. Better when your design has small text or thin details that a thick thread can’t capture accurately.
PVC / Rubber:
Waterproof and flexible. Good for outdoor gear or workwear that takes a beating. Holds color well even in harsh conditions.
Iron-on vs Sew-on:
This is how the patch attaches, not what it’s made of. Iron-on works fine on stable fabrics. Sew-on is the better call for uniforms going through heavy, frequent washing. Honestly, iron-on gets a bad reputation, but on the right garment, it holds perfectly well.
The type you pick shapes everything, how it looks on day one and how it holds up six months later.
How Can You Pick The Right Type Of Patch?
When you have to choose the right custom patch for your outfit, do not second-guess yourself like every other person. It is simpler than it looks.
Start with the fabric:
Heavier materials like wool, denim, and canvas hold patches well. Thinner or stretchy fabrics need more thought; the wrong backing can pucker the garment or prevent proper bonding.
Think about placement:
A chest patch reads professional. A sleeve patch feels team-oriented. Where it sits changes how the whole outfit comes across, so decide the location before you finalize the size.
Size matters more than people expect:
Too small, and the design gets lost. Too large and it overwhelms the garment. A good rule your patch shouldn’t be the first thing someone notices. It should be the thing they appreciate once they look closer.
Then think about durability:
If it’s going on a work uniform or team kit, it needs to survive regular washing without lifting at the edges or fading. Choosing the right custom patch for your outfit isn’t just about the design. The construction has to match the demand you’re putting on it.
When these four things line up, the decision becomes straightforward.
How to Apply Custom Patches Correctly
Getting the patch right is half the job. Applying it wrong undoes all of it.
First thing, figure out your fabric before you decide on the method. That choice drives everything else.
For iron-on, set your iron to medium-high heat and turn the steam off completely. Place the patch where you want it, press down firmly for about 30 to 45 seconds without sliding the iron around. Let it cool, then flip the garment and press again from the inside. That second press is what most people skip. It’s also what makes the bond actually hold. Works well on cotton and denim. On nylon, polyester, or anything waterproof — don’t bother. The heat won’t bond properly, and you’ll end up with lifting edges within a few weeks.
Sew-on takes a bit more effort, but it’s the stronger option long term. Pin the patch first so it doesn’t shift while you work. Match your thread to the patch border, not the garment. It looks cleaner. Stitch all the way around the edge, tight and consistent. Pay extra attention to the corners. That’s where lifting always starts and where a few reinforced stitches make the biggest difference down the line.
For uniforms and workwear, go through regular washing; sew on every time. For a casual jacket or personal gear that doesn’t see heavy use, iron-on is perfectly fine.
A well-applied patch should feel like it belongs on the garment. Not like something stuck on top of it.
Where to Find Trusted Places for Custom Patches in Canada
If you’re sourcing personalized uniforms Canada for a sports team, a trades crew, or a business workforce, the supplier you choose matters as much as the patch itself. Local options have a real edge. Faster samples, easier communication, and someone you can hold accountable if something comes back off.
Finding trusted places for custom patches starts with knowing what good actually looks like because price alone will mislead you every time. A cheaper supplier who skips proofing or uses low-grade thread costs more in the long run. Reorders, delays, patches lifting after a month. Not worth it.
Here’s what separates a reliable supplier from the rest.
Physical proof before production:
A real sample, not just a digital file. Check the color, feel the backing, and confirm the size. This step protects your whole order.
Straight answers on turnaround:
A good supplier gives you a clear timeline upfront. Vague responses usually mean trouble later.
They ask about your garment:
Fabric type, wash frequency, and how it’ll be used. A supplier asking these questions understands what they’re actually making for you.
Whether you’re outfitting ten people or a hundred, take time to vet properly. The right supplier makes the process smooth. The wrong one is an expensive lesson.
How Long Does a Custom Patch Order Actually Take?
This is the question most people ask too late, usually when they’re two weeks out from a team event or a uniform launch.
The honest answer is that it depends on the supplier. You have to look for trusted places for custom patches. But here’s a realistic timeline to work with so you’re not caught off guard.
Design approval — 1 to 3 days:
You submit your artwork, and they send back a digital proof. If revisions are needed, add another day or two. Having a clean, print-ready file upfront speeds this up significantly.
Physical sample — 5 to 7 days:
A real sample gets made and shipped to you for approval. This step is non-negotiable for bulk orders. Don’t skip it to save time. Catching a color issue here saves you from a full reorder later.
Production — 7 to 14 days:
Depends on quantity and patch type. Embroidered patches on larger runs take longer. Some Canadian suppliers offer rush production for an added cost, worth asking about upfront if your deadline is tight.
Shipping — 2 to 5 days:
Local Canadian suppliers have an obvious edge here. Overseas production might save money per piece, but it adds weeks to the timeline, something worth factoring in early.
Total — roughly 3 to 4 weeks from first contact to delivery:
If you’re working toward a specific date, count backwards from it. Four weeks is a comfortable window. Two weeks is cutting it close. Less than that and you’re relying on everything going perfectly, which it rarely does.
Plan early. It’s the simplest advice and the most ignored.
Frequently Asked Questions
Can you iron patches on polyester?
Not recommended. Polyester doesn’t handle high heat well and can warp under the iron. Sew-on is the safer call for synthetic fabrics.
How long do embroidered patches last?
A well-made patch on a properly cared-for garment can last years without fading or fraying. The quality of the thread and backing makes all the difference; cheap construction shows within a few washes.
Sew-on vs iron-on — which holds better?
Sew-on wins for uniforms, workwear, and anything going through regular heavy washing. Iron-on works fine for casual use on stable fabrics. When in doubt, sew it down.
Time to Make It Yours
Whether you’re outfitting a full team, rebranding your workwear, or just adding something personal to a jacket, the patch is never just a patch. It’s the detail that makes the whole thing feel intentional. You now know what type to pick, how to apply it, where to find a supplier worth trusting, and how to make it last. That’s more than most people walk in with. So the next uniform that arrives, it won’t feel like everyone else’s.

I’m the creative voice behind the blog at Embroidered Patches Canada, where I turn custom patch design into clear, practical insights for brands, teams, and creators. I provide tips on how to design embroidered patches that not only look spectacular but also have a lasting impact, covering everything from materials and stitch styles to advertising strategies and patch trends. I help companies, organisations, and individuals transform their ideas into elite custom patches that tell a story by providing in-depth instructions, trend updates, and professional advice.